
Power Measurment Circuit Prototype - 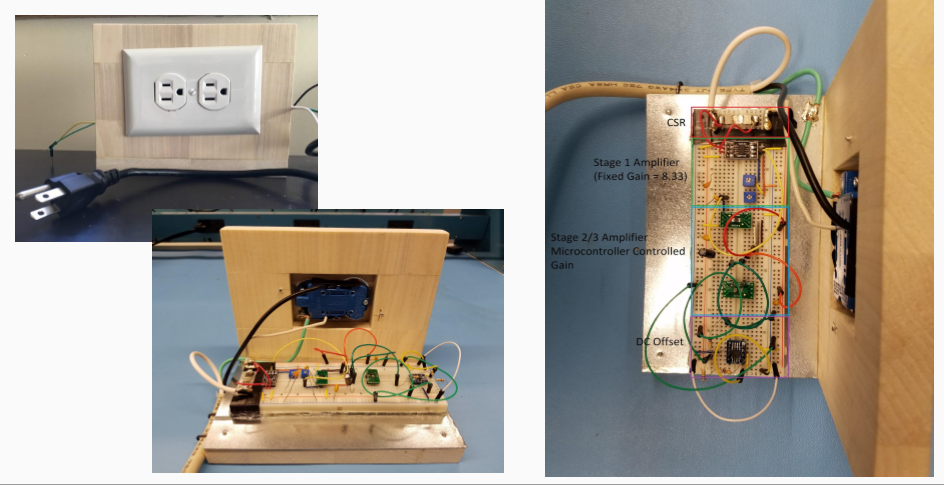
This is our first protype. It consists of our power measuring circuit only, which is used for measuring the power of a device you would plug into it. Once we were confident in the performance and accuracy of our prototype we moved on to creating a PCB of our designed circuit.
PCB - 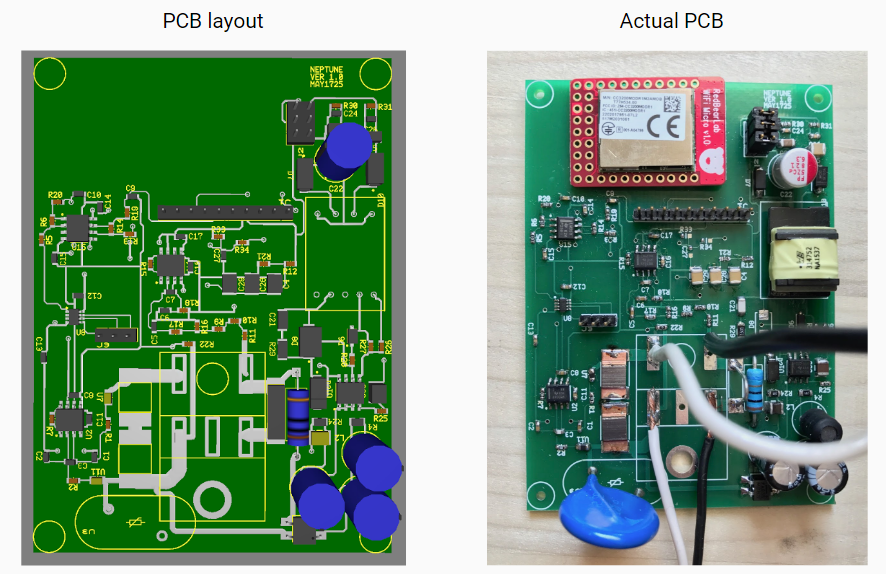
Below is the PCB of our power measuring circuit. It is designed to fit inside our case, and be compatable with the cc3200 which fits into the upper left hand corner of our board (which you can see on the Actual PCB picture below). We use the cc3200 for data conversions and sending data via wifi to our web application.
3D Printed Case - 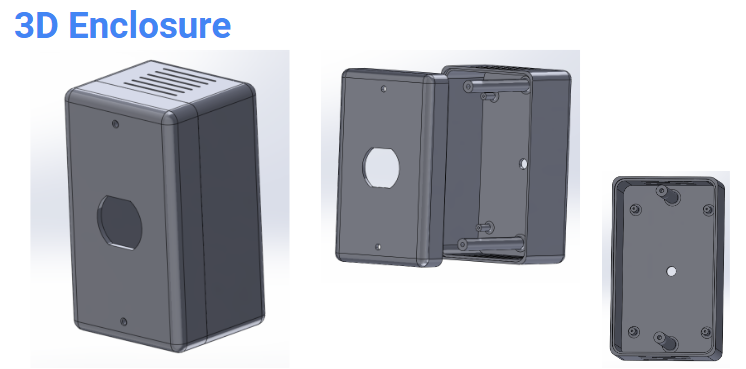
Our case is 3D printed and made to house the PCB, cc3200, and all the internal wiring needed to connect these components to the outlet. Our PCB has wiring that could be dangerous if people were able to come into contact with it, so the case adds a needed protection from the wiring of our circuit.
Website - 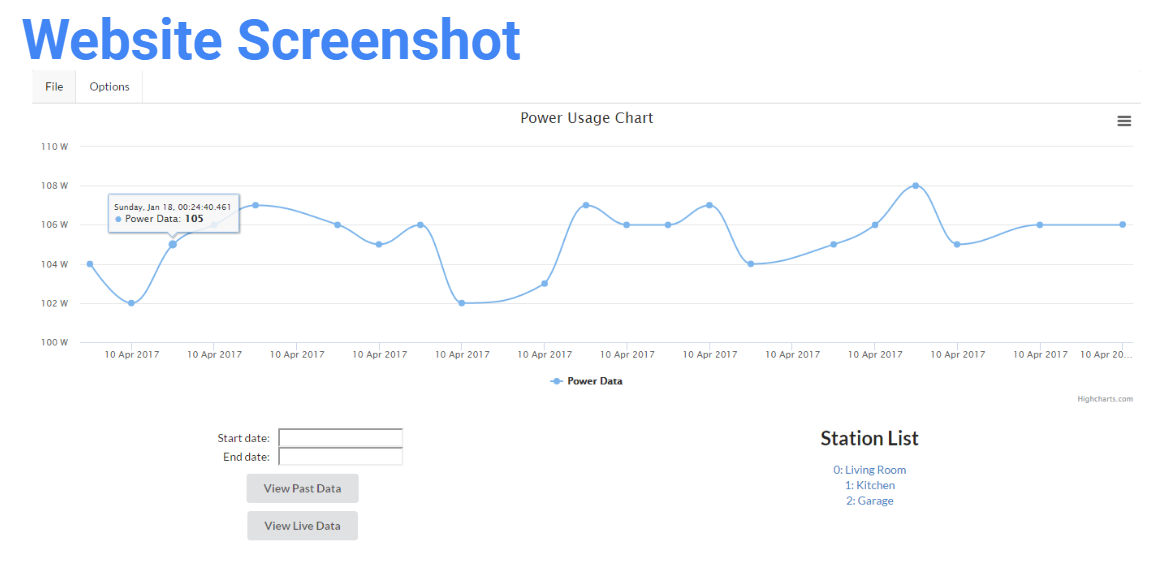
The website serves as the interaction between the user and our power monitoring device. Here the user can look at the power usage from differnt devices that they plug into our monitoring station. They are able to toggle between different time periods, and select individual data points to get thier readings. The website automatically resizes to fit whatever power is being monitored so it is always easy to read.
Final Fixture - 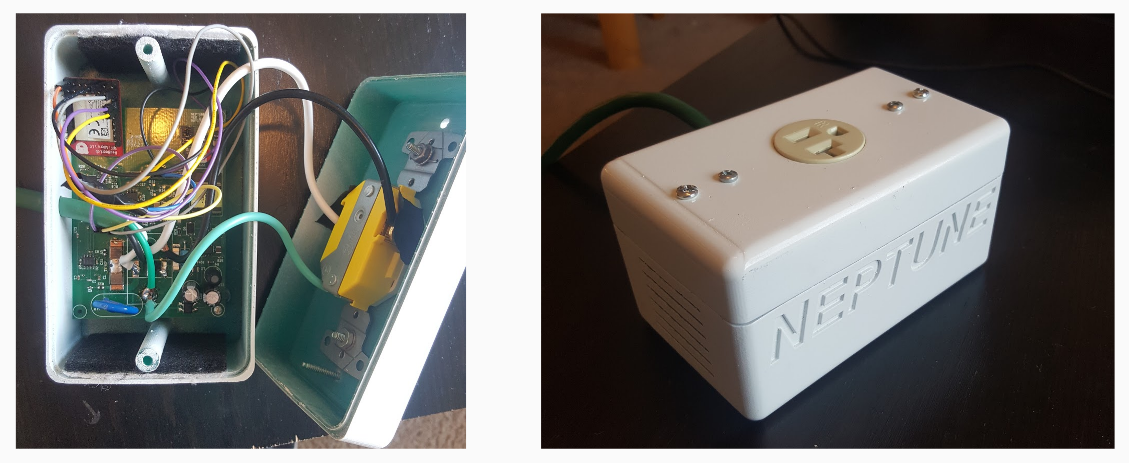
Our final fixture is the combination of all the components of our project. Inside the case is the PCB and cc3200, which together are able to read the power of an object, and send it via wifi to our web application. Also there is an extention cord that allows you to plug our device into hard to reach outlets so the case can be out of the way.